Testing the extension
This should only be used to troubleshoot issues with connecting to ERP and we recommend running one test at a time.
We recommend that you skip this step and just come back to it if you have issues after completing the build and testing via the main interface.
Enable the test event
To enable the test button, you must add the manual event in your list of triggered events.
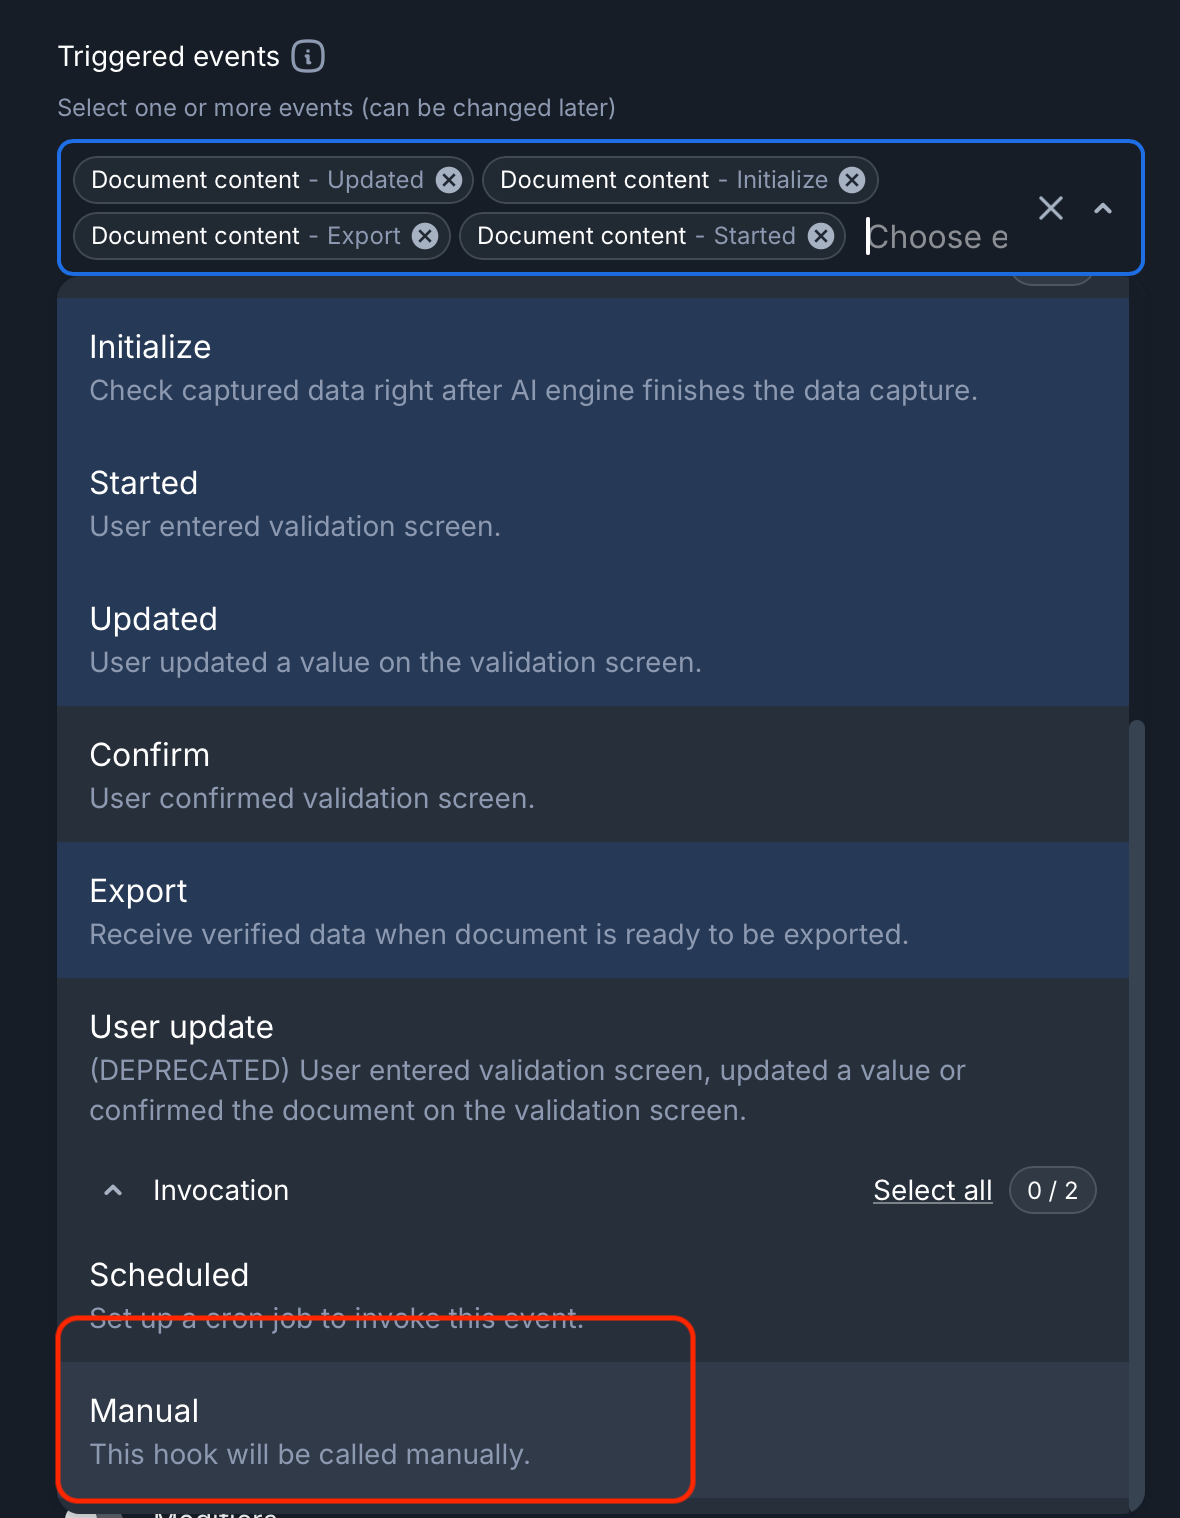
This will then show the invoke button which will be activated after saving the extension settings.
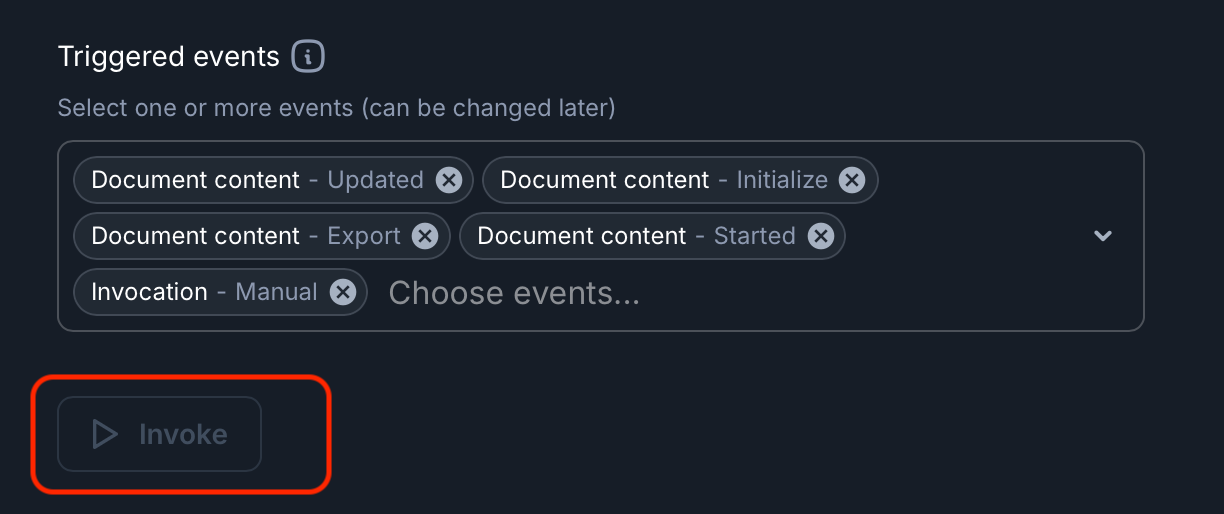
Run and view the test
To run the test, simply click on the invoke button.
The button will spin for up to 30s to show that the test is running.
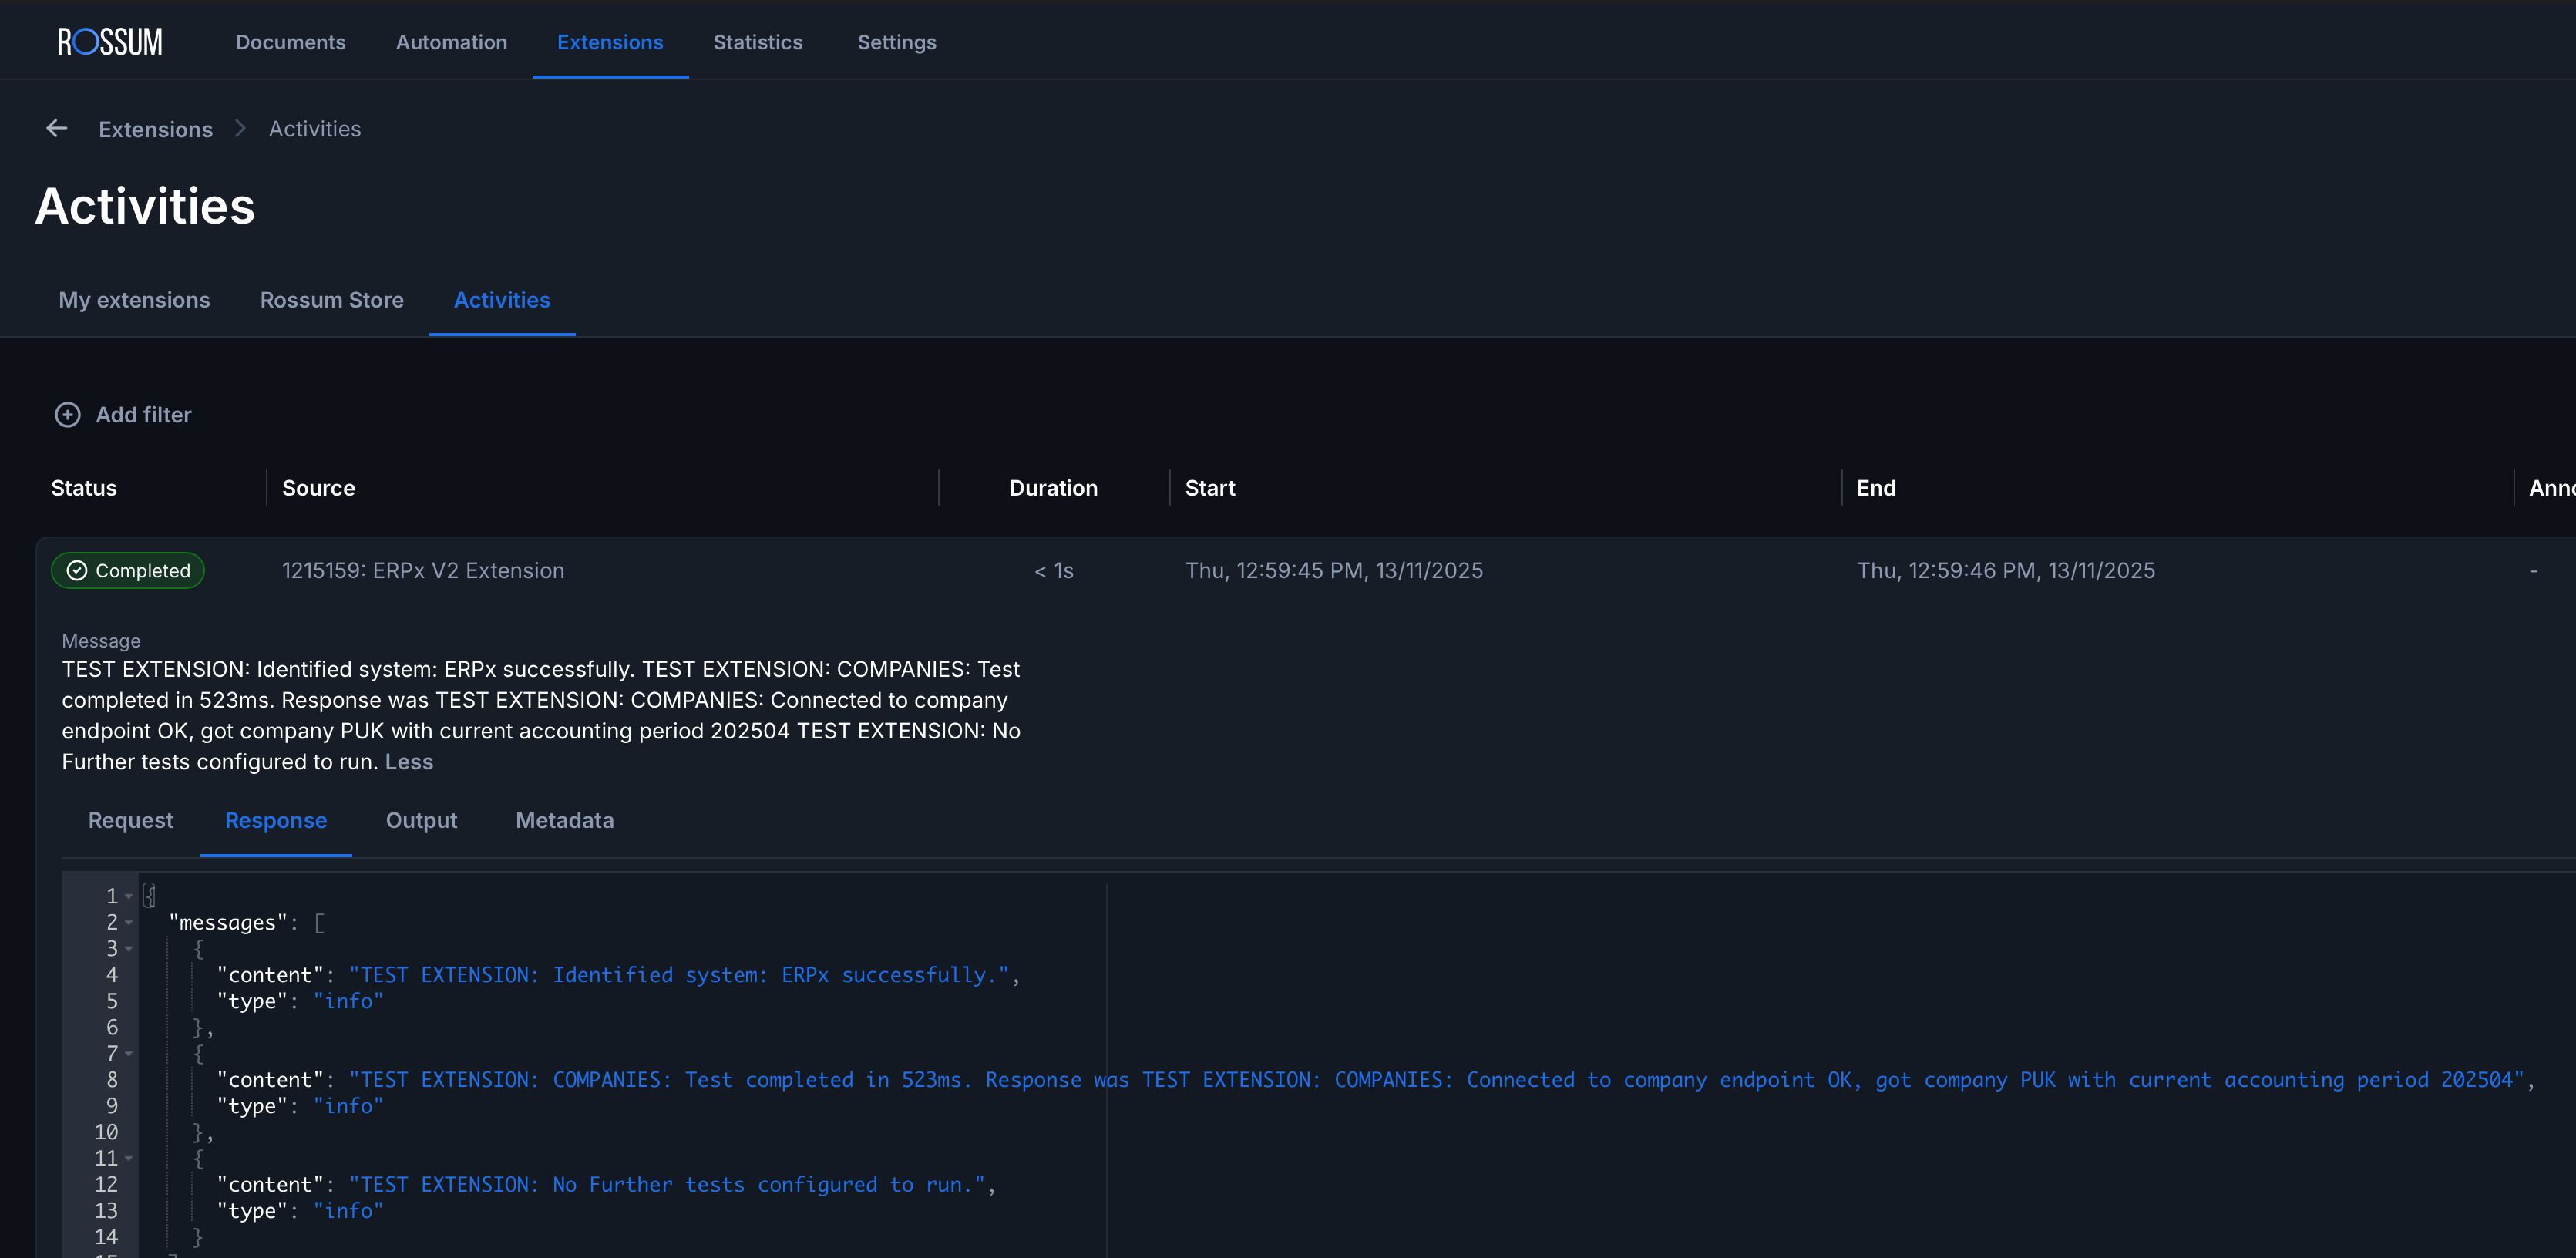
Once complete, the results are available from the extensions > activities log section.
The system will always report back the underlying ERP system type (CR / ERPx ERP7), and try to connect to the companies end point
Without any additional tests configured, the result looks something like this and you can see the time taken to run in ms.
The results are easier to read in the Response section.
Additional tests
You may wish to perform further tests if you are having problems with a particular endpoint.
To do this, you must add test settings to the extension settings JSON.
Available tests
The current tests available are listed below
supplier You must a provide a testValue = a single active supplierId
attributeValues You must a provide a testValue = a single attributeId
accountCodes
purchaseOrders You must a provide a testValue = a single numeric active PO number
payRecipients You must a provide a testValue = a single pay recipient id
accountRules You must a provide a testValue = a single numeric account rule number
supplierGroup You must a provide a testValue = a single active supplier group id
taxCodes You must a provide a testValue = a single active tax code id
taxSystems
valueMatrix You must a provide a testValue = a value matrix id
users You must a provide a testValue = a user email address
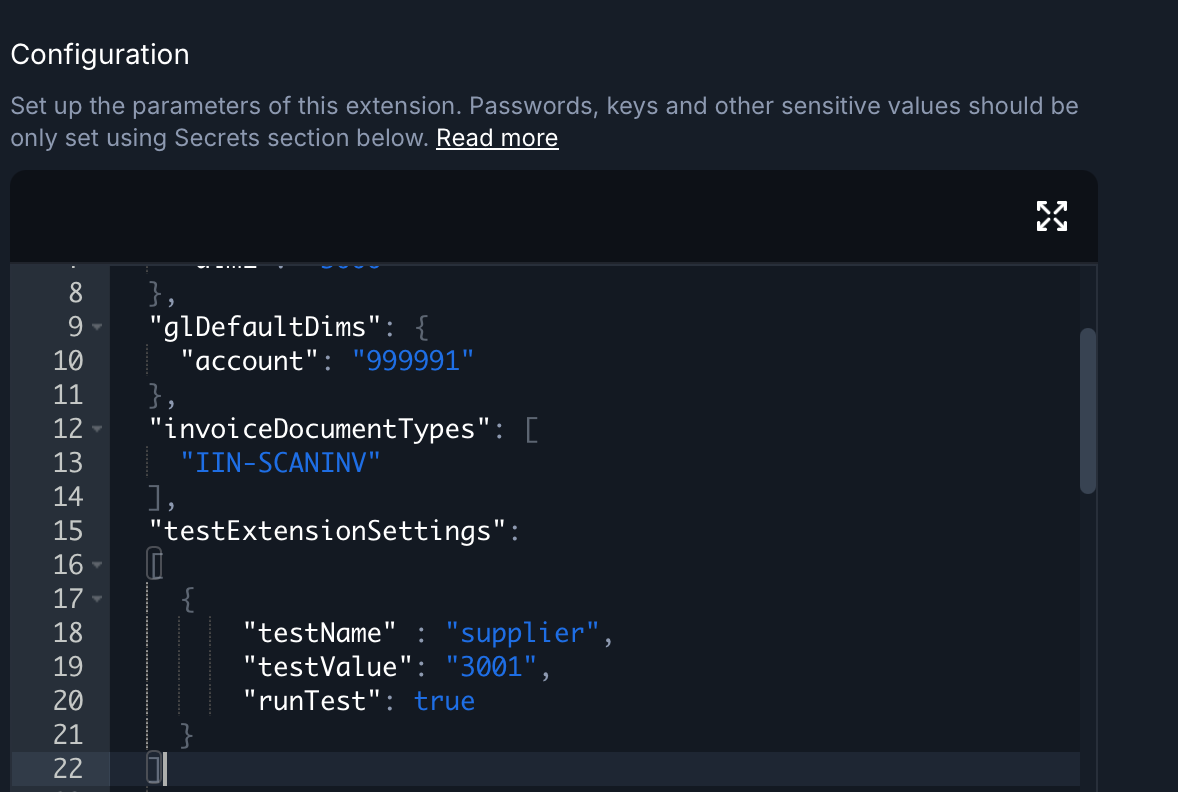
Test extension settings
The tests should be provided as an object containing an array of test objects in the format:
  "testExtensionSettings":
  [
    {
        "testName" : "'supplier' | 'attributeValues' | 'accountCodes' | 'purchaseOrders'  | 'payRecipients' | 'accountRules' | 'supplierGroup' | 'taxCodes' | 'taxSystems' | 'valueMatrix' | 'users';",
        "testValue": "string",
        "runTest": "boolean",
    }
  ]
The test should be added to the extension settings
As warned above, we recommend that you run one test at a time by only applying that setting.
We have provided an entire example below just to show examples of each test in one place.
"testExtensionSettings":
[
{
"testName" : "supplier",
"testValue": "3001",
"runTest": true,
},
{
"testName" : "attributeValues",
"testValue": "C1",
"runTest": true,
},
{
"testName" : "accountCodes",
"testValue": null,
"runTest": true,
},
{
"testName" : "purchaseOrders",
"testValue": "10418",
"runTest": true,
},
{
"testName" : "payRecipients",
"testValue": "1000",
"runTest": true,
},
{
"testName" : "accountRules",
"testValue": "1",
"runTest": true,
},
{
"testName" : "supplierGroup",
"testValue": "01",
"runTest": true,
},
{
"testName" : "taxCodes",
"testValue": "11",
"runTest": true,
},
{
"testName" : "taxSystems",
"testValue": null,
"runTest": true,
},
{
"testName" : "valueMatrix",
"testValue": "12",
"runTest": true,
},
{
"testName" : "users",
"runTest": true,
}
]